
Karen Davies Cookie Craft Moulds
The brilliant Karen Davies is at it again. Her new line of moulds are meticulously detailed, and have an entirely genius new use...COOKIES!!
Of course, they will mold fondant, chocolate, gum paste, even Isomalt, as they always have, but with this cookie recipe, you can create gorgeous cookies without touching a piping bag. Now that's GENIUS!!!
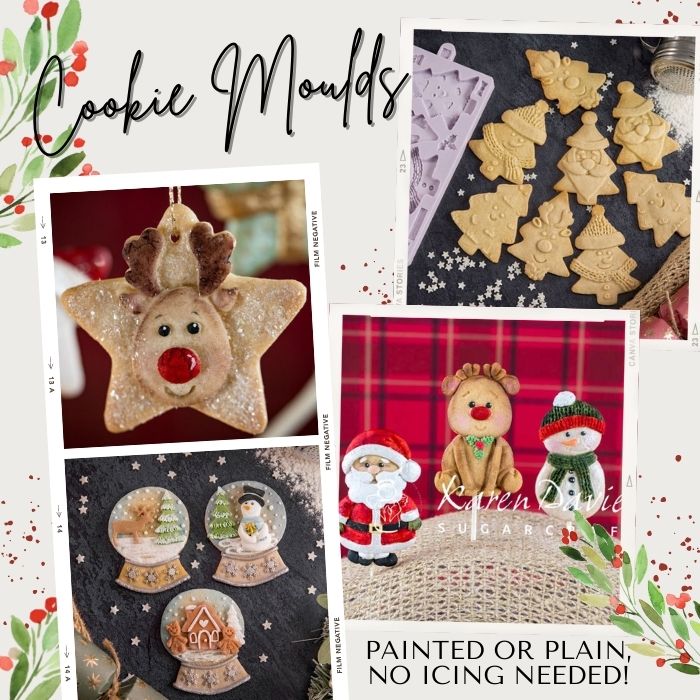
Read on for Karen's specially formulated cookie recipe, but first, check them out in action!
How about one more!
Scroll down for Karen's No-Spread Cookie Recipe and instructions, but first, shop all the moulds plus a few of our new cookie embosser sets that work beautifully with this technique as well!
Swipe For More Products >>>


Our ECG IncrEDIBLE Paints work beautifully on them, so don't ice...paint your way into the Holiday Spirit this year!
Swipe For More Products >>>
-
-
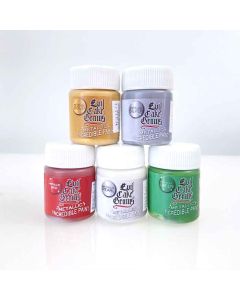 IncrEDIBLE Paint Christmas Metallics Set
$41.35
Regular Price
$49.95
IncrEDIBLE Paint Christmas Metallics Set
$41.35
Regular Price
$49.95
-
 IncrEDIBLE Paint Christmas Essential Set
$42.08
Regular Price
$51.96
IncrEDIBLE Paint Christmas Essential Set
$42.08
Regular Price
$51.96
-
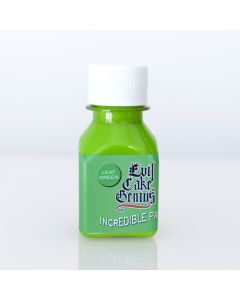 ECG IncrEDIBLE Paint Leaf Green-50ml
Special Price
$11.69
Regular Price
$12.99
ECG IncrEDIBLE Paint Leaf Green-50ml
Special Price
$11.69
Regular Price
$12.99
-
IncrEDIBLE Paint Christmas Metallics Set$41.35 Regular Price $49.95
-
IncrEDIBLE Paint Christmas Essential Set$42.08 Regular Price $51.96
-
ECG IncrEDIBLE Paint Leaf Green-50mlSpecial Price $11.69 Regular Price $12.99

The secret to creating perfect moulded cookies is to use a dough that won’t spread.. Here we share with you Karen's perfect sugar cookie recipe..
Perfect Sugar Cookie Recipe
- 75g caster sugar (in the US, this is called superfine sugar, it is NOT powdered sugar or granulated sugar)
- 3 tablespoons golden syrup (can substitute light corn syrup)
- 1 tablespoon water
- 95g unsalted butter
- 260g plain flour sifted, plus a little more (if needed)
Optional Flavors
- For vanilla cookies, add seeds from 1 vanilla pod
- For lemon cookies, add finely grated zest of 1 lemon
- For orange cookies, add finely grated zest of 1 orange
- For chocolate cookies, replace 50g of the plain flour with 50g cocoa powder
Method
- Put the sugar, syrup, water, and any zest flavouring or vanilla seeds together in a large saucepan.
- Bring them to boiling point, stirring all the time. Remove the pan from the heat and stir in the butter until melted.
- Next, stir in the flour gradually until you have a smooth dough (remember to substitute 50g of flour for 50g of cocoa powder if making chocolate cookies) – add a little more flour if you think it needs it. Knead your dough and then leave it covered in a cool place to become firm (approximately 30 minutes).
- Pre-heat the oven to 180°C, gas mark 4.
- If you’re not immediately making cookies, wrap the dough in plastic wrap and refrigerate (or freeze) until you are ready to use it. Before using, bring to room temperature.

How To Mould And Bake
As a general rule of thumb, we suggest that you follow the moulding instructions that come with your mould. Otherwise, please follow the steps below..
- Dust your mould with Plain Flour or Cornflour and tap out any excess.
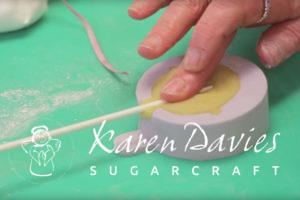
- Take some of your cookie dough and roll into a smooth ball. Press the smoothest side down into your mould. Use your fingers to push the dough into the mould until it is flat on the back and up to all of the edges. Use your thumb to tear away any excess. If using one of our larger moulds, you can roll your dough into the mould using a rolling pin.
*Top Tip* If you would like to bake your cookies onto lollipop sticks, now is the time to attach them! With your dough still in the mould – place the top of your stick about half way up the back of the moulded item. Take a small piece of spare cookie dough and press over the back of the stick so you can no longer see it. This will secure your stick into your dough. *Please note* Lollipop sticks can only be added to items that are complete once turned out of the mould. If you plan on cutting your moulded item with a shaped cutter afterwards, you will distort the shape.
- Turn your mould over and slowly peel the mould back until you see the dough start to fall out. Keep pulling back slowly so as not to tear any thinner details.
- Place on a baking tray lined with baking paper (you may have to bake in batches).
- Each design will vary in cooking time due to their various thicknesses. Smaller items take approx. 8 minutes. Larger items take 10 – 15 minutes. Keep an eye on your oven to prevent anything from burning.
- Once baked leave them to cool on the baking sheet for a few minutes before transferring them to a wire cooling rack.
- Cookies can then be decorated with edible powder colours, edible paints, edible glitter and/or royal icing!
Don't forget to make some Old World (and other fun designs) of Chocolate Covered Oreos!!

Check out VIDEO for our mega-easy Chocolate Covered Oreo Molds! or Browse All Holiday Project Videos
Now Check out 17 More Inspiring Christmas Cookie Designs HERE